

Posted by Christine Obbink-Huizer
Table of contents
Abaqus 2020 is now available. The download and installation is similar to that of Abaqus 2019.
As with Abaqus 2019, it is straight forward as long as the downloaded files are extracted to a common file structure and that the installation is done using (full) administrator rights, especially using Windows 10.
I’ll go through the process below. It includes print screens of most windows. Those that only require confirmation are left out for brevity.
If you want to know what's new in the Abaqus 2020 release, please go to our other blog topic. Abaqus 2020: What's new.
1) Download the Software
Go to https://www.3ds.com/support/download/ and click on ‘access your download’. You will then need to log in with 3ds credentials. Click on the products of interest, in this case Simulia Abaqus, Isight, fe-safe, Tosca. You will then reach the software download page (Figure 1).Select the release (Abaqus 2020) and level (Abaqus 2020 Golden).
For each of the components listed, click on ‘Show details’. This will then change into ‘Hide details’.
The various downloadable entities are then shown in light blue. Click on each of these to download and save them. Since this is about 15 GB of data, it may take some time.
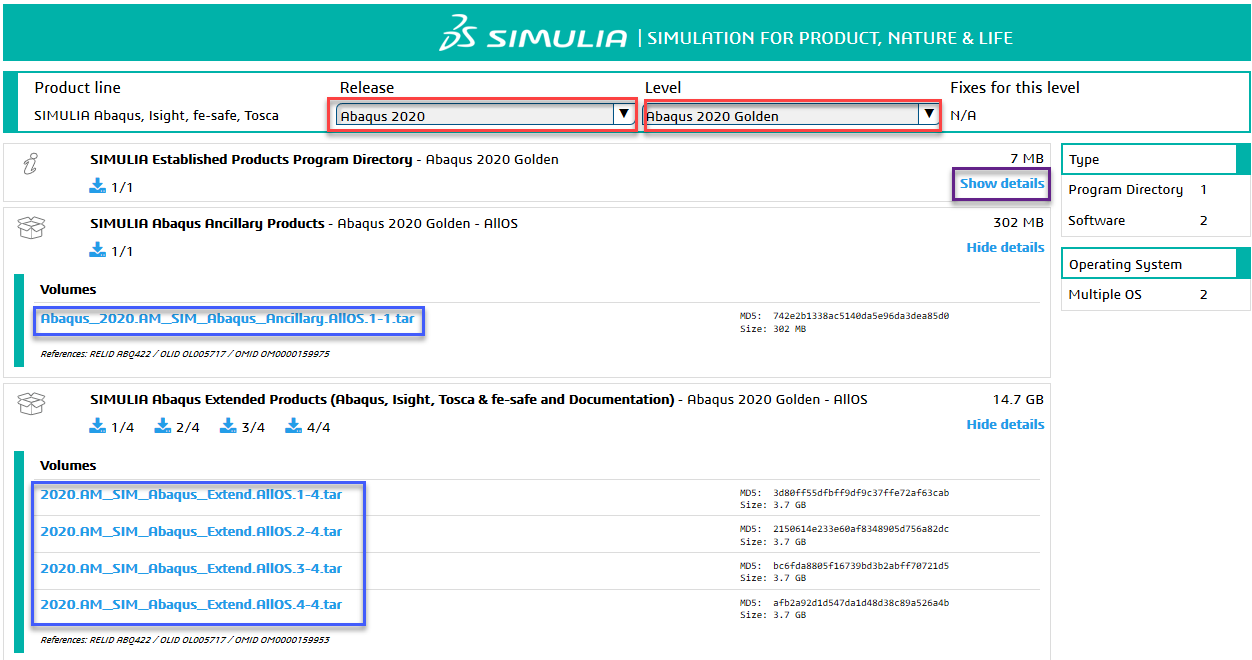 Figure 1: Software download page. The location where the release and level can be selected is shown in red. ‘ Show details’ is indicated in purple. The actual downloads are indicated in blue. Please note that currently one download (for the Program Directory) is now shown, because ‘Show details’ is not clicked yet.
2) Extract Data to a Common File System
All the downloaded .tar files must be extracted to a location of choice. For the Extended Products, the 4 .tar files must be extracted together into a common file system. With WinRar and 7zip this can be done by selecting the 4 .tar files at the same time, right-clicking and then selecting ‘Extract here’. The result should be a folder named ‘ AM_SIM_ABAQUS_EXTEND.ALLOS’, not 4 folders with the names of the .tar files.
3) Check Whether Extraction Was Successful
This is not strictly necessary, but if things go wrong later on, it helps to know that at least the files were ok. On Windows, execute the following file:<download directory>\AM_SIM_Abaqus_Extend.AllOS\1\0data\intel_a\DSYInsMediaCheck.exe
On Linux, execute the following file:
<download directory>/AM_SIM_Abaqus_Extend.AllOS/1/0data/linux_a64/DSYInsMediaCheck
This may take a while. In the end, the results should be ‘PASSED’ (Figure 2).
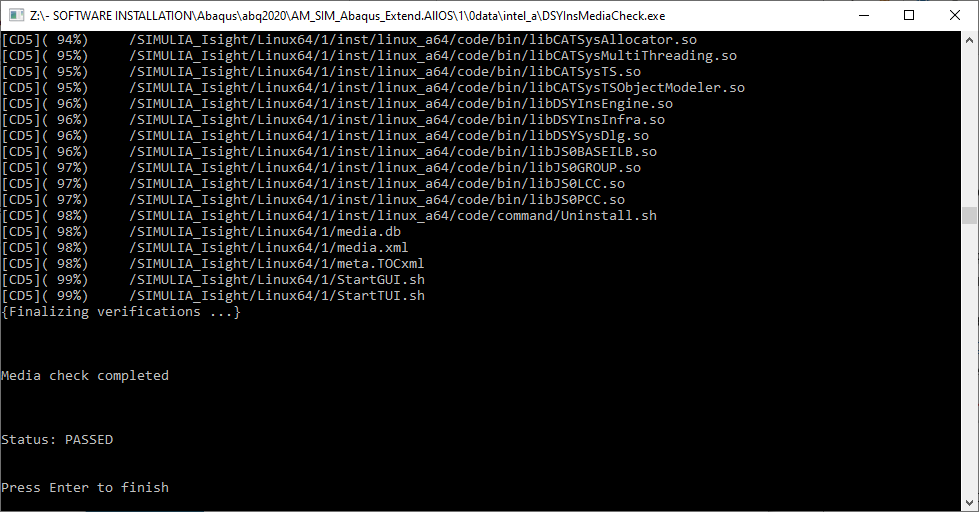
Figure 2: Result of DSYInsMediaCheck.exe, indicating all files are properly extracted.
3a) If Necessary: Install DSLS
Abaqus can be used either of two license systems. FlexNet is used most often, but DSLS is possible as well. In the rare cases that DSLS is to be used and the license server needs to be installed, then this must be done before the rest of the software is installed. More information on this can be found in the documentation of the DSLS, which is here: <download directory>\AM_SIM_Abaqus_Extend.AllOS\1\DS_License_Server\AllOS\1\DSLS.pdf. Do not install the DSLS license server if it is not needed.
4) Run the Suite Installer As Administrator
Especially for Windows 10, it is important to have and use administrator rights when installing Abaqus and the extended products. It is best to install from the administrator account. An account with administrator rights may also work, but with Abaqus 2019 and Windows 10, we have often seen that it was not possible to run Abaqus due to issues related to administrator rights.
Right click on the suite installer (<download directory>\AM_SIM_Abaqus_Extend.AllOS\1\setup.exe) and select ‘run as administrator’ (if possible). The SIMULIA 2020 installation program will then start. Click ‘Next’.
Select the medias to install and click ‘Next’ (Figure 3). To use Abaqus, at least the SIMULIA Established Products and the SIMULIA Established Products CAAAPI should be installed. Select Isight if you want to install Isight as well. Select the FLEXNet License Server if you are using the FLEXNet licensing system, and the system you are performing the installation on should function as license server. For the documentation, we typically use the online version (available at help.3ds.com). In this case it is not necessary to install one of the first three components. If the documentation should be available offline as well, then install the Extended Product Documentation. Using EXALEAD improves the search functionality. This requires an additional license that is available free of charge. It is intended to run on servers, and may not function properly on e.g. Windows 10. The installation of this component is not shown here.
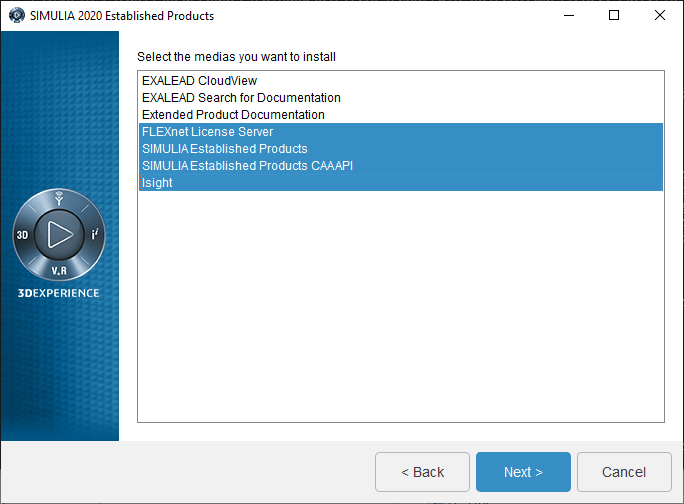
Figure 3: Select the components to be installed.
Check whether the correct components are selected and click ‘Install’.
4a Documentation
If the documentation is selected, the installation folder must be given. Usually the default is ok. You must then select the components for which the documentation should be installed (Figure 4). In this case all documentation components are installed for the sake of completion, though this is not necessary if you already know that you will neve use a specific component.
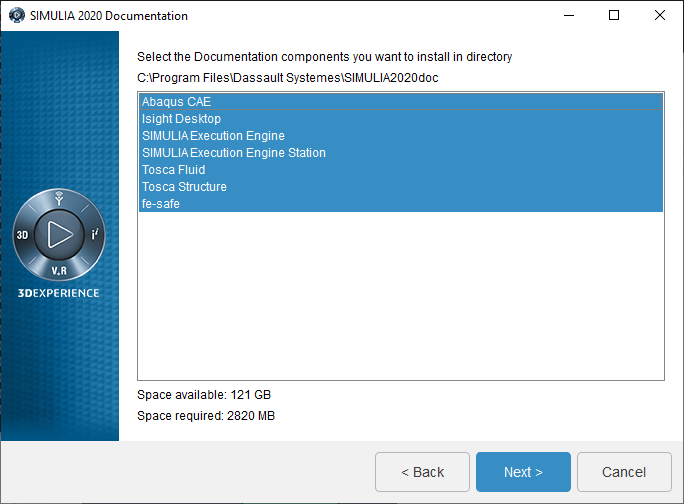
Figure 4: Select the components for which the documentation components to install.
We are then asked whether to search using EXALEAD (Figure 5). This is ticked by default, and should be unticked if EXALEAD is not used.
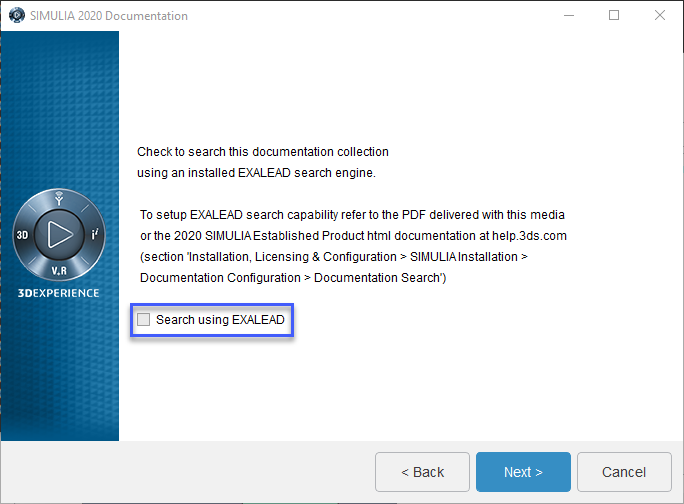
Figure 5: Untick the box if EXALEAD is not used.
Click ‘Next’, check the summary provided and click ‘Install’.
The documentation will now be installed. When this is finished, the installation is confirmed and we can continue by selecting ‘Close’.
4b License Server
If the license server is to be installed, we are asked for the installation directory. Usually the default is fine. We then need to choose whether to only install the license server, or also start it. The default is to start it. Check the box for files only – do not start the license server program if the license server should not be started. The location of the license file is then requested (Figure 5).
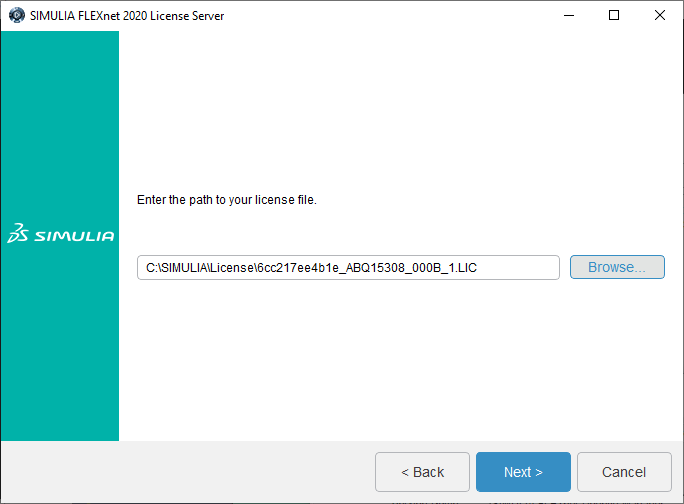
Figure 5: Enter path to license file.
If Abaqus is already used, it is typically the newest .lic file in C:\SIMULIA\License. If this is the first Abaqus installation, this is a file that is received by e-mail.
Check the installation details and select ‘Install’ to start the installation of the FLEXnet license server. When this is finished, the installation is confirmed, and we can continue by selecting ‘Close’.
4c Established Products
The installation of the established products (Abaqus, Tosca and fe-safe) is next. Select the installation directory and click ‘next’, typically the default is fine. The components to be installed are then selected (Figure 6).
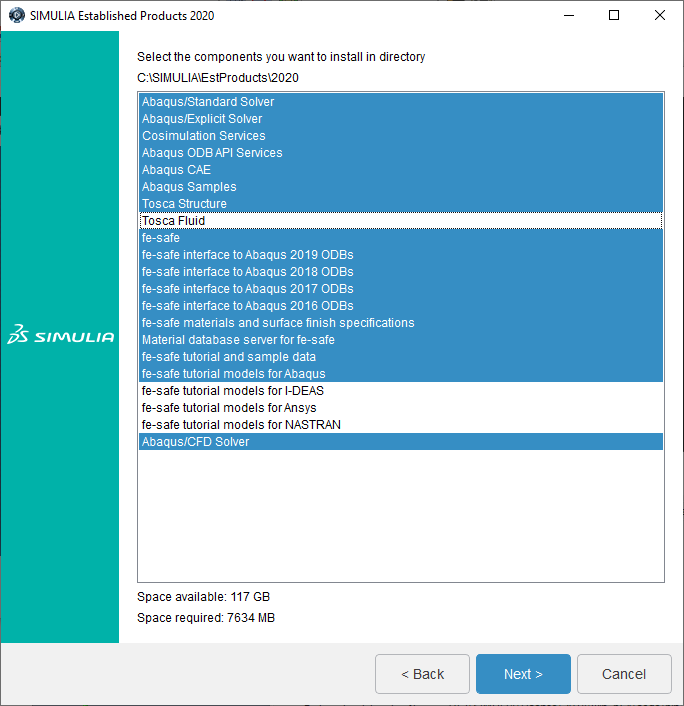
Figure 6: Select the established products to install.
Note that now Abaqus, fe-safe and Tosca can be selected from the same window, while previously each was installed individually and required a separate installation folder to be provided. The space required is given. Typically, all Abaqus related components are to be installed. If Tosca is to be used with Abaqus (or another structural solver), install Tosca Structure. If it should be used with CFD software (as well) install Tosca Fluid (as well). If you want to use fe-safe, typically you will want to install most fe-safe related components, except the tutorial models for programs that you do not use and the interface to Abaqus for ODB versions that you do not use. Click ‘Next’ to continue.
Select the License Server Configuration and click ‘Next’. Usually, the default SIMULIA FLEXnet is used.
You are then asked for the License server (Figure 7). If the license server is on the same system as the one on which Abaqus is currently installed, then the default ‘localhost’ can remain unchanged. If the license server is on a different machine, fill in the name or IP address of this machine. To include a port number, use portnumber@machine. Click ‘Next’.
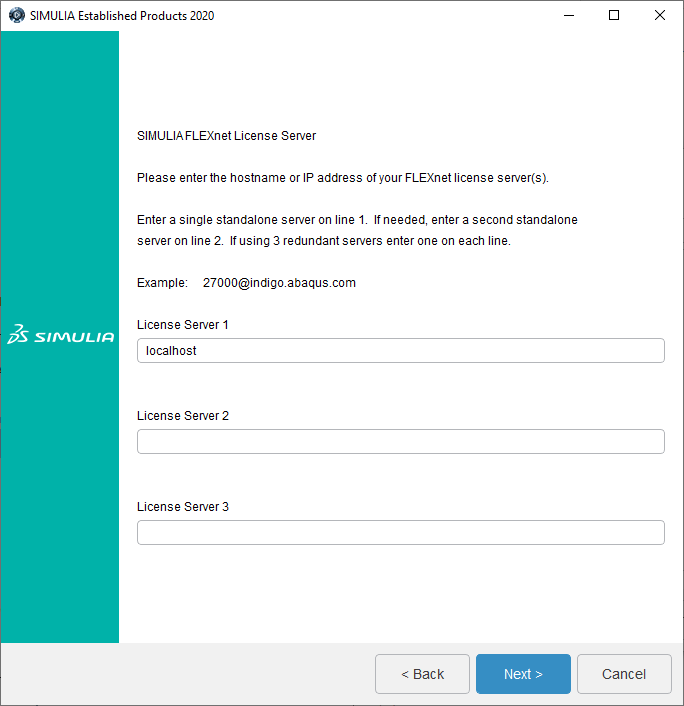
Figure 7: Specifying the SIMULIA FLEXnet License Server.
The system will now try to locate the license server. If this fails, an error message will be given. While it is possible to circumvent this and continue the analysis anyway, we do not recommend this. If the license server cannot be found, this is often due to a firewall blocking the connection. This is easier to troubleshoot during the installation than afterwards. Therefore, we recommend not continuing the installation, but solving the connectivity issue first.
If the connectivity to the license server is ok, the next step is to select the default Working directory (Figure 8). This is the default location of abaqus job files and of the abaqus.rpy file. It also serves as scratch directory for Tosca Fluid. The directory must exist, and the user must have write permissions to this directory in order to run the software. The default is c:\temp. Click ‘Next’ to continue.

Figure 8: Selecting the default working directory.
The CAE commands directory path can then be chosen (Figure 9). This is the location where the Abaqus launch commands will be stored. Usually the default of C:\SIMULIA\Commands is fine. 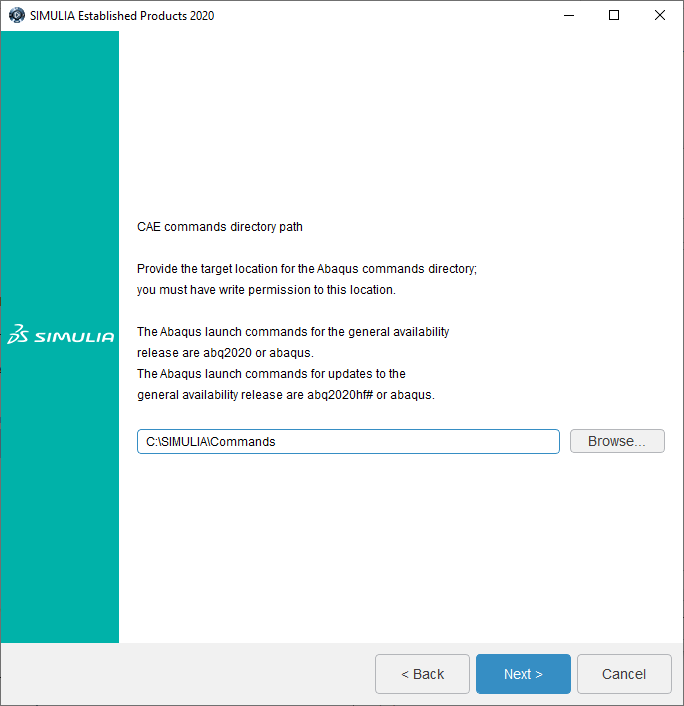
Figure 9: Selecting the Abaqus commands directory.
An Abaqus/CAE external plugins directory path can be selected (Figure 10). If some plugins and/or material libraries are to be used by multiple users in the same organization, then these can be stored in an external plugins directory that is accessible to all these users. This directory should then be selected. If such a structure is not present, the default is fine. Click ‘Next’.
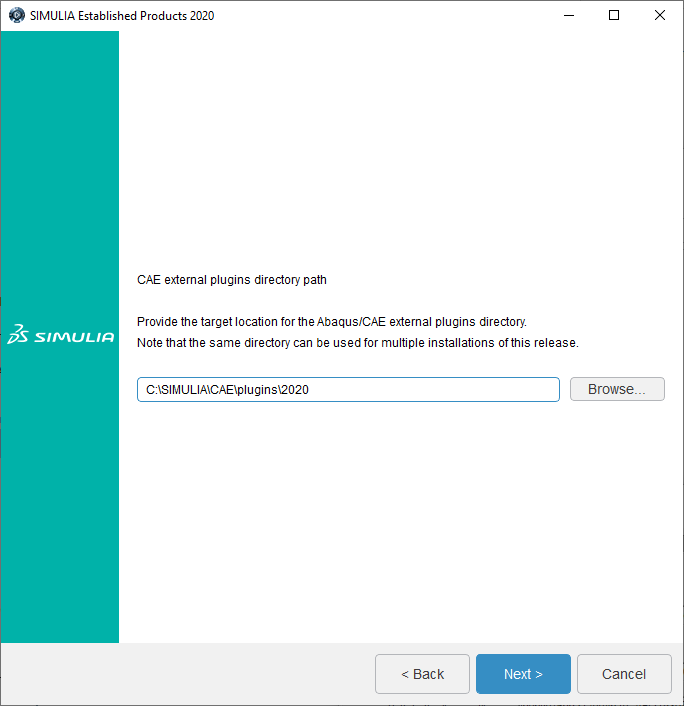
Figure 10: Selecting an Abaqus/CAE external plugins directory.
The Tosca Solver Interface(s) are then selected (Figure 11)
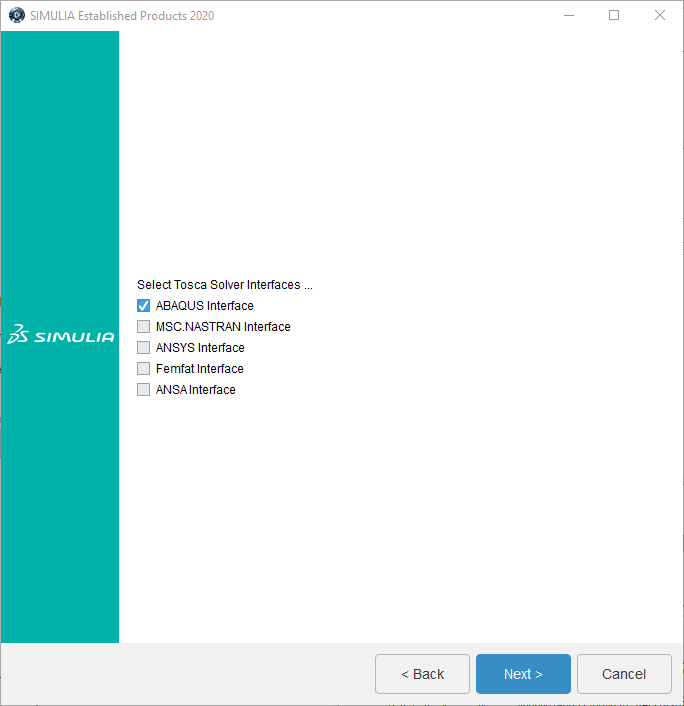
Figure 11: Tosca Solver Interfaces.
Toggle on those that you intend to use, and select ‘Next’.
Check whether the information provided is correct and click ‘install’ to start the installation. Click ‘ok’ if necessary. If everything succeeds, you will get a message that the verification finished. Click ‘Continue’, and ‘Close’.
4d CAA API
The next step is to install CAA API. If the defaults are used, then the CODE installation directory will be known and ‘Next’ can be selected. Select the CAA API components to install (typically for all the components installed before) and click ‘Next’. Verify the information and click ‘Install’, and after installation is complete click ‘Close’.
4e Isight
Finally, Isight is installed. Select the installation directory (usually the default is fine) and click ‘Next’. Choose the Isight components to install (Figure 12) and click ‘Next’. The SIMULIA Execution Engine is used to distribute the execution of simulations between available resources. It is not necessary when running Isight on a single system.
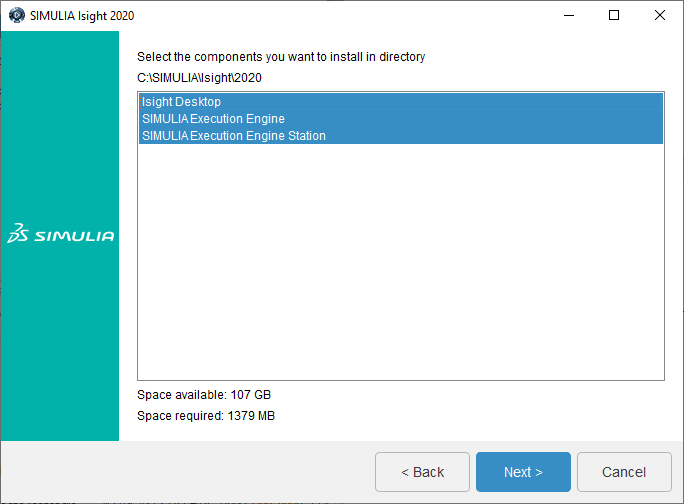
Figure 12: Selecting Isight and SEE components to install.
For the SIMULIA Execution Engine, a profile can be selected. If you do not intend to use this, it can be skipped (Figure 13).

Figure 13: Install Isight without SEE client Connection Profile.
The documentation can be configured in different ways. In this case, the documentation is installed and we choose to enter a file path for locally installed documentation (Figure 14).
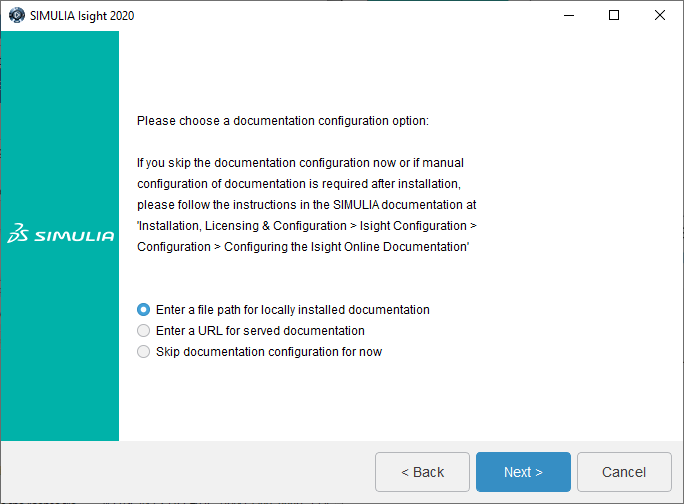
Figure 14: Choose Isight documentation configuration.
Since the documentation was installed at the default location, we can leave the documentation path as is and click ‘Next’ (Figure 15).
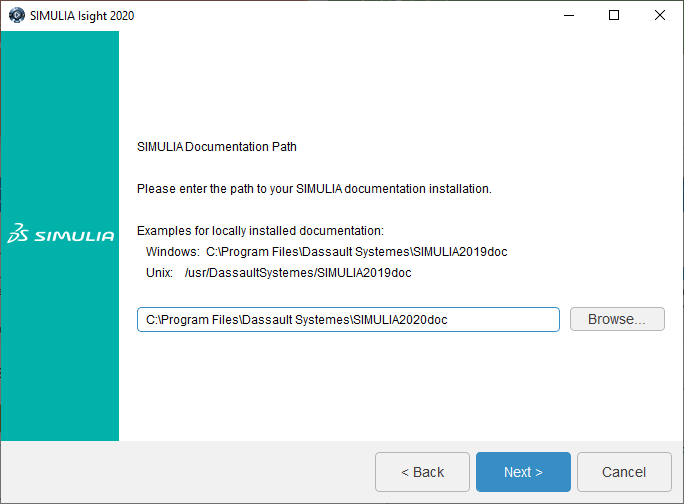
Figure 15: Specifying the Isight documentation path.
Review the information and click ‘install’. Select ‘ok’ if needed and ‘close’ when the install is finished. The complete installation is then finished. You will see an overview of all the different components installed and can click ‘close’.
Abaqus, fe-safe and Tosca 2020 are now available under ‘Dassault Systemes SIMULIA Established Products 2020’. Isight is available under Dassault Systems SIMULIA Isight 2020.


TECHNIA Simulation provides top tier FEA, Non-linear, and Advanced Simulation Software, Training, and Consultancy. Our dedicated team of more than 65 Simulation experts across 16 countries advise and support your innovation with a wealth of specialist knowledge and experience.
About TECHNIA- Related news and articles straight to your inbox
- Hints, tips & how-tos
- Thought leadership articles

Helping you find the information you’re looking for. Discover webinars, events, FAQ's, case studies and tutorials.
VIEW HUB