A bulk material may be reinforced with a stiffer outer layer or a beam structure connected to it. In Abaqus, such layers or beams can be included by creating shells or beams that are tied to the bulk material. It is more efficient, however, to use a skin to model a shell layer, or a stringer to model a beam. With these options additional shell (skin) or beam (stringer) elements are created that share nodes with the underlying mesh. They don’t need to be meshed separately and no tie is required. Properties can be defined similar to regular shell or beam elements.
In this blog, I will show how to define skins and stringers and assign properties to them.
Example: Ball Impacting Foam
As an example, a ball impacting a piece of foam material will be used (Figure 1). On top of this foam, a layer of steel will be added using a skin and on the edges beam reinforcements using stringers will be made.
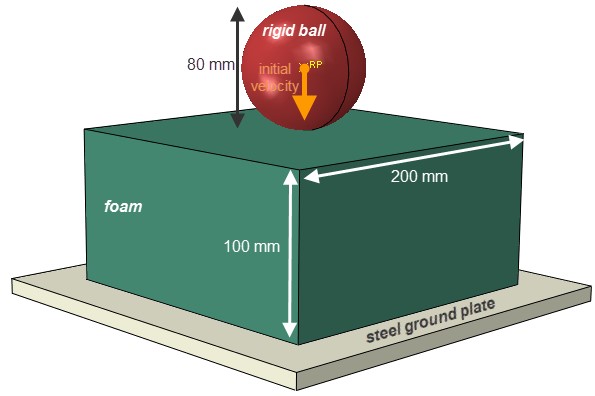
Figure 1: Model without skin or stringers.
The ball has a diameter of 80 mm and is assumed to be rigid. It has a mass of 500 grams. It can only move in vertical direction, and it has an initial velocity of 10 m/s. The foam has dimensions of 200 x 200 x 100 mm and hyperfoam material properties. A steel ground plate is included as well. The bottom of this plate is fully constrained. General contact is used with default normal behaviour and a friction coefficient of 0.26. Abaqus/Explicit is used. The results of this analysis can be seen in the movie .
Creating the Skin
The model will now be extended to include a 0.1 mm steel layer on top of the foam using a skin. The skin can be created from the Property module while the foam part is opened, by selecting Special > skin > create…. (Figure 2)
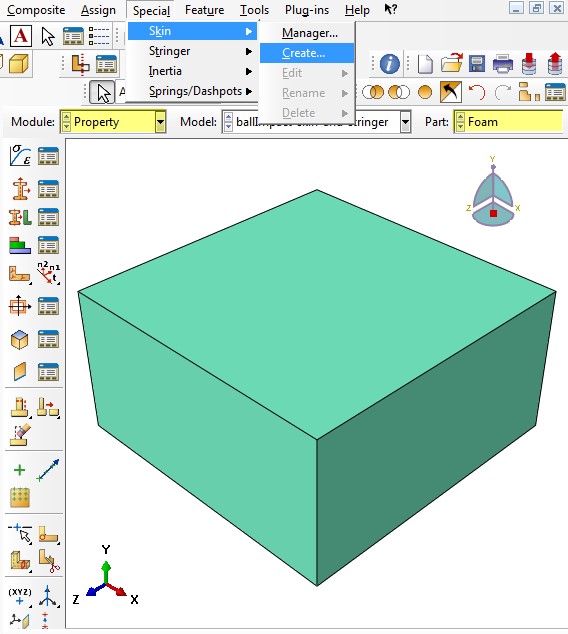
Figure 2: Creating a skin.
The next step is to select the entities on which to create the skin, in this case the top face of the foam (Figure 3).
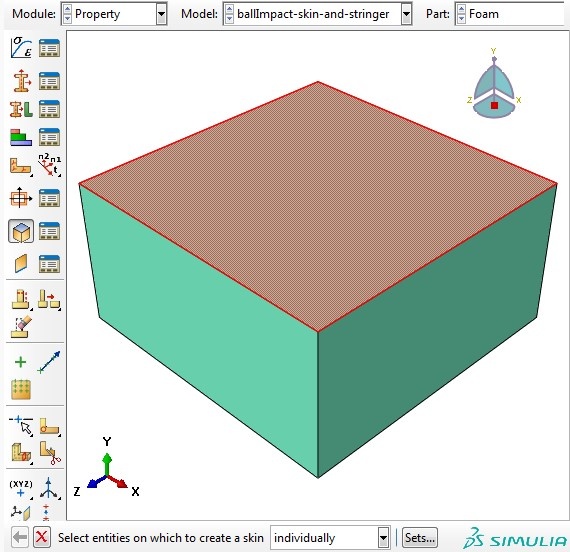
Figure 3: Entity on which to create skin selected.
By confirming, the skin is defined and visible in the model tree (Figure 4), though no changes in the geometry can be seen.
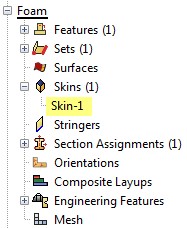
Figure 4: Model tree including skin.
The skin does not have any properties yet. A shell section is required for the string. In this case a 0.1 mm thick shell section of an elastic-perfectly plastic steel material is defined. To assign the section, the normal ‘assign section’ icon can be used. To simplify selection of the skin, it is possible to select ‘skins’ as possible selection regions (Figure 5). The skin can now easily be selected and the section assigned.
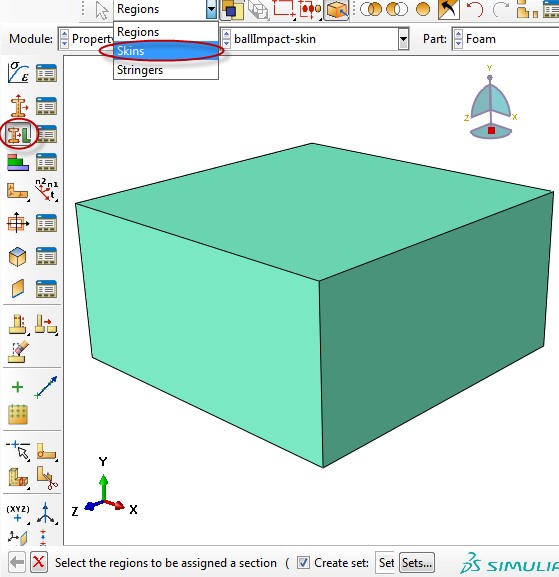
Figure 5: Choosing 'Skins' as potential selection region.
With this step, the steel layer is included in the model and connected to the foam. Separate meshing of the skin is not necessary, as it shares its nodes with the underlying foam.
Creating the Stringers
Stringers are created in a manner similar to skins: from the Property module while the relevant part is opened, by selecting Special > stringer > create…. In this case, the vertical edges of the foam are selected as the entities on which to create the stringer (Figure 6).
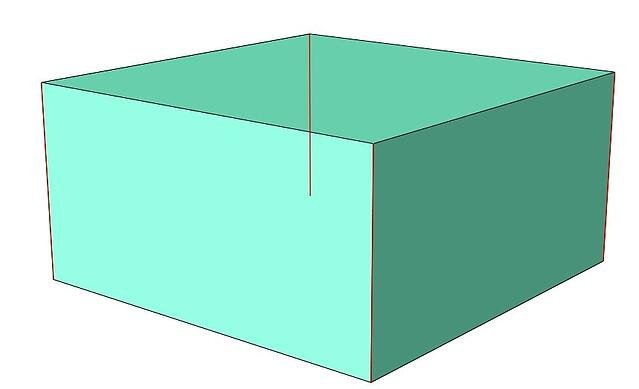
Figure 6: Stringer location.
The stringer now appears in the model tree, though no changes in the geometry can be seen. As with the skin, properties need to be assigned to the stringer. As with regular beams, a section assignment and a beam orientation are required. A beam section corresponding to a beam with circular cross-section (diameter 1 mm) and elastic-perfectly plastic steel material properties is defined. This section is assigned to the stringer. Again, selecting the region can be simplified by only selecting from certain types of regions, in this case Stringers. This can also be used to select the region to assign the beam orientation. The model is now completely defined and a job can be created and submitted.
Corresponding Input File
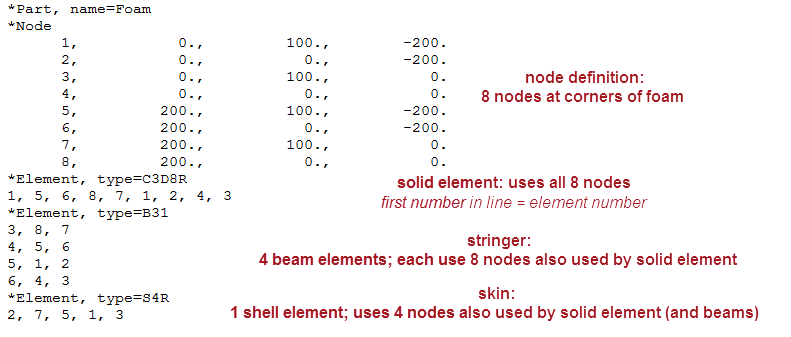
As stated before, skins and stringers correspond to new elements that share nodes with underlying geometry. This should be visible in the input file. To make the input file more clear, the mesh seeds are chosen such that the bulk foam material is represented by a single element (Figure 7). Then we indeed see that while new element numbers are used to define the elements corresponding to the skin and stringer, these elements are made up of the same node numbers as the bulk material.
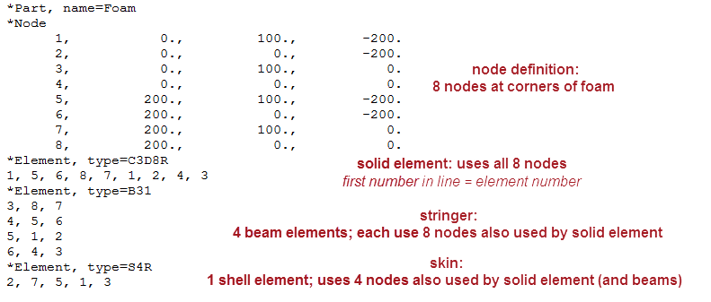
Figure 7: Input file for foam part with skin and stringer. Element size is huge: the bulk foam material corresponds to a single element.
Results
The normal options to visualise shell thickness and beam profiles also works for skins and stringers (Figure 8).
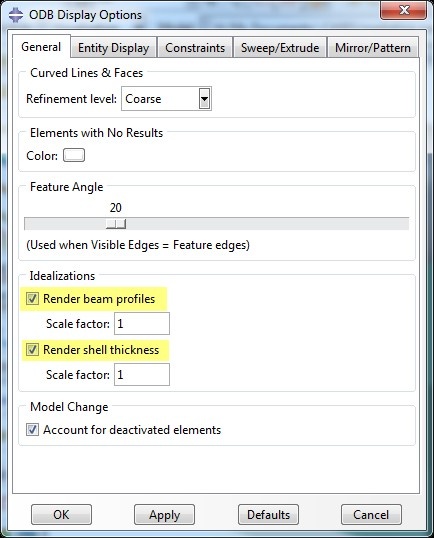
Figure 8: Rendering beam profiles and shell thickness.
The influence of the extra steel layer is clearly visible in the deformation pattern: the deformation becomes less smooth and there is plastic deformation in the steel skin (Figure 9 and video ).
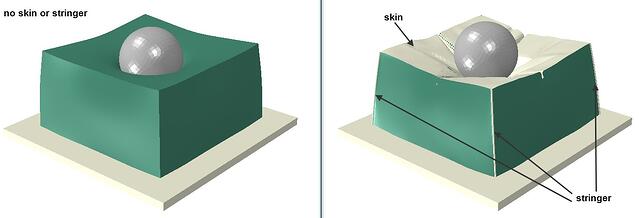
Figure 9: Model without (left) and with (right) skin and stringer. Color coding based on material properties.
Conclusion
Skins and stringers are a simple way to define shells or beams that share nodes with underlying geometry. This can be used to model reinforcements that are fixed to the material. Skins and stringers cannot only be defined on solids. A multilayer shell material can also be defined using skins for example.
Are you interested in using these techniques for your FEA challenges, but don't know how?
Talk to one of our FEA specialists today!
