Geometry import and meshing is one of the key areas where we as FE analysts can spend a lot of time and effort. For meshing in particular, using hexahedral elements to mesh complex parts can be difficult. In this blog we explore one way to obtain a hexahedral mesh for two relatively difficult parts.
Introduction
Without going too much into element selection criteria, first-order tetrahedral elements are considered as poor elements, and typically require very fine meshes to produce good results. Second-order tetrahedral elements as suitable for general use but have a slower convergence rate. The general advice is to use hexahedral elements whenever possible. For complex geometries, in some cases it is virtually impossible to use hex meshes; however, for some it may be possible by using some clever partitioning. It just takes a bit of time.
So how to mesh more complex geometries with hexahedrals? One idea is to partition the part into smaller parts, to help Abaqus "understand" how for instance a structured mesh would conform to this geometry. Let’s look at some examples.
Example 1 - Femoral Stem
First, we have the femoral stem from a total hip joint replacement from GrabCad (Figure 1). On the left hand side we see how the original geometry looks like and on the right hand size how it would look if meshed with tetrahedrals (using default options). To use this mesh for example in a normal load-failure analysis, the mesh density should be higher (much higher). This would make time needed to solve this much slower than it needs to be.
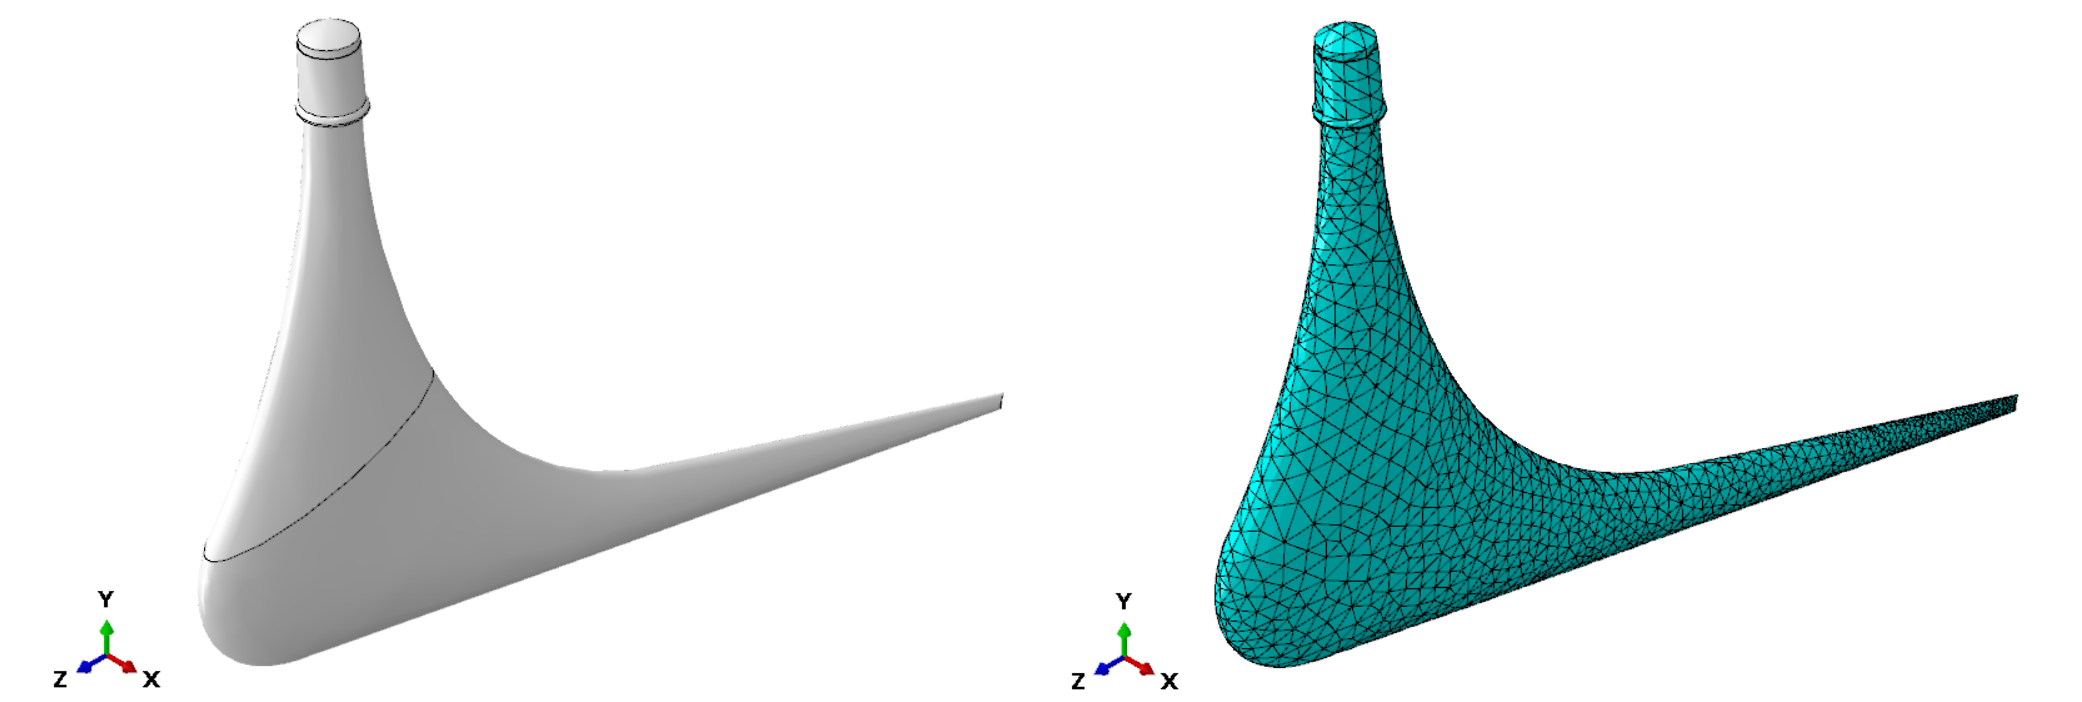
Figure 1. Original geometry and mesh.
Given that this geometry has a few straight edges and seems to be symmetric, let's add a few cutting planes as an offset from the principal axes (Figure 2-Left, 2YZ planes, 1XY plane). After cutting the geometry using a YZ-plane in the center of the stem, we use the second YZ-plane (the one slightly offset from center, doesn't intersect any geometrical features), to create a shell and extrude it through the entire stem.
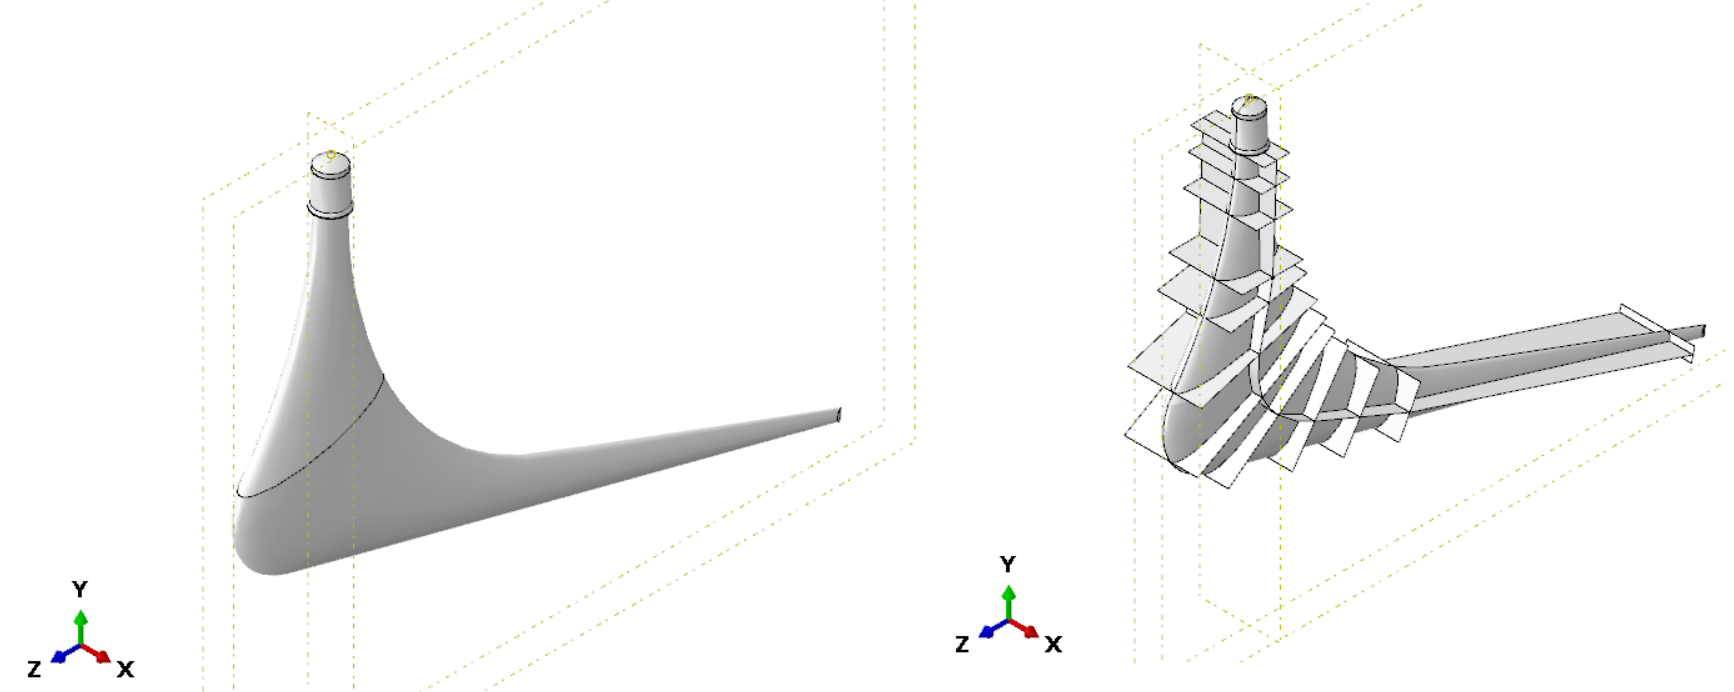
Figure 2. A few cutting planes and shell used to define the mesh path.
The shell "geometry" defines a path that the mesh should follow, and certain regions where the part could be divided. For instance, at the curvature point, we transition from horizontal to almost vertical subdivisions (Figure 3).
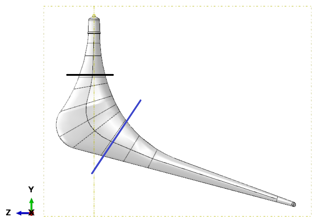 Figure 3. YZ-plane view of the shell path. Black line - from this point up all lines (cutting planes) will be horizontal; Blue line - from this point down all lines (cutting planes) are parallel to this line. Line going through the center is at almost the midpoint between the exterior edges.
Using the Partition Cell: Extend Face, we can partition the entire stem body. Now we have quite a few partitions made (40). If we switch to the mesh module... we can now generate a sweep mesh on the stem (Figure 4).
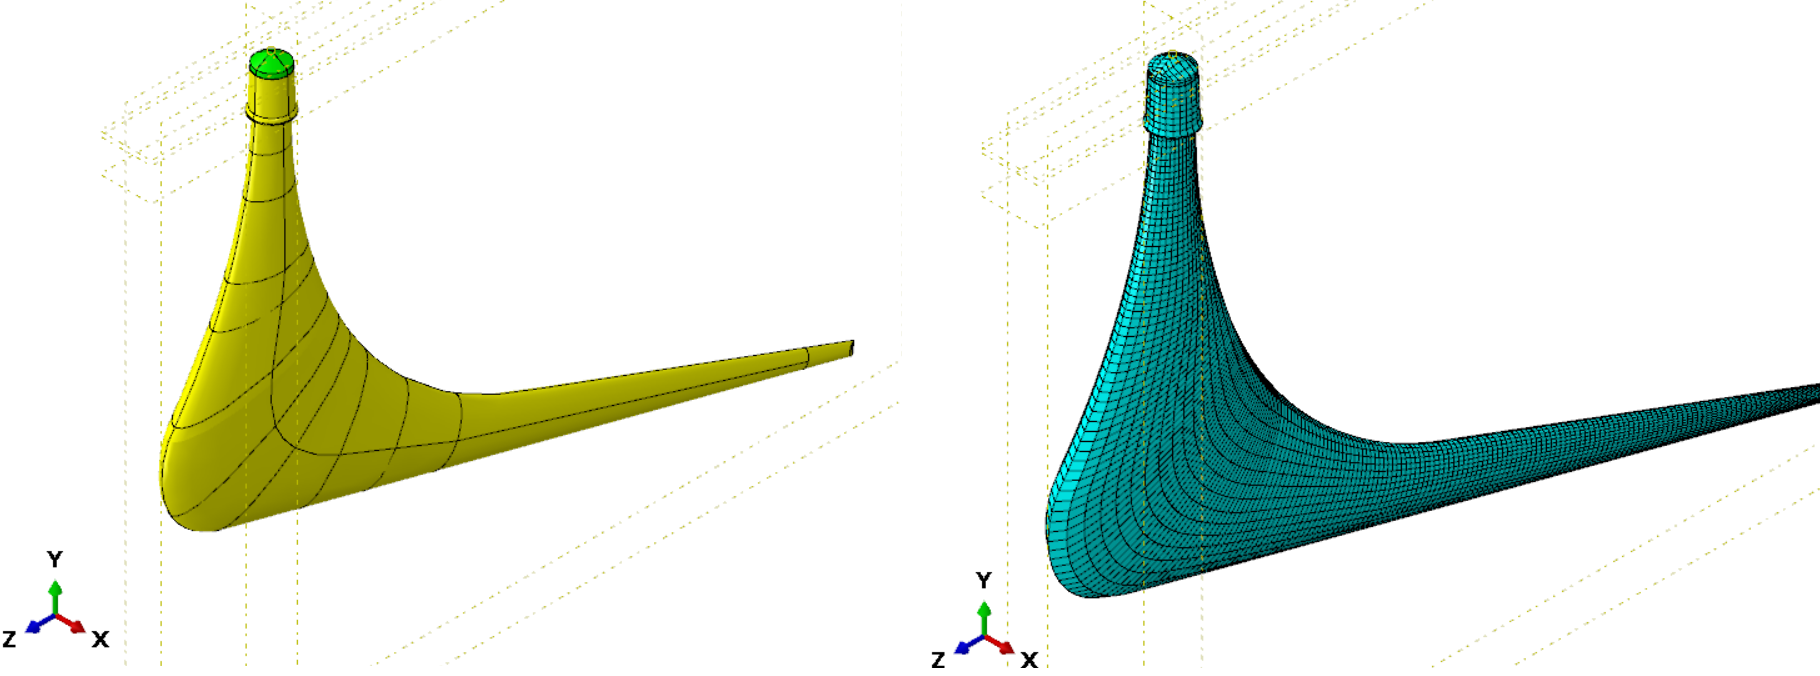
Figure 4. Swept mesh obtained after some cell partitioning.
Using the same mesh seed (10), let's see how many tet and hexa elements we will have: ~20k for the hexahedral and ~150k for the tetrahedral (Figure 5). Of course the hexahedral mesh may not be dense enough, but now we can locally refine the mesh at critical regions.
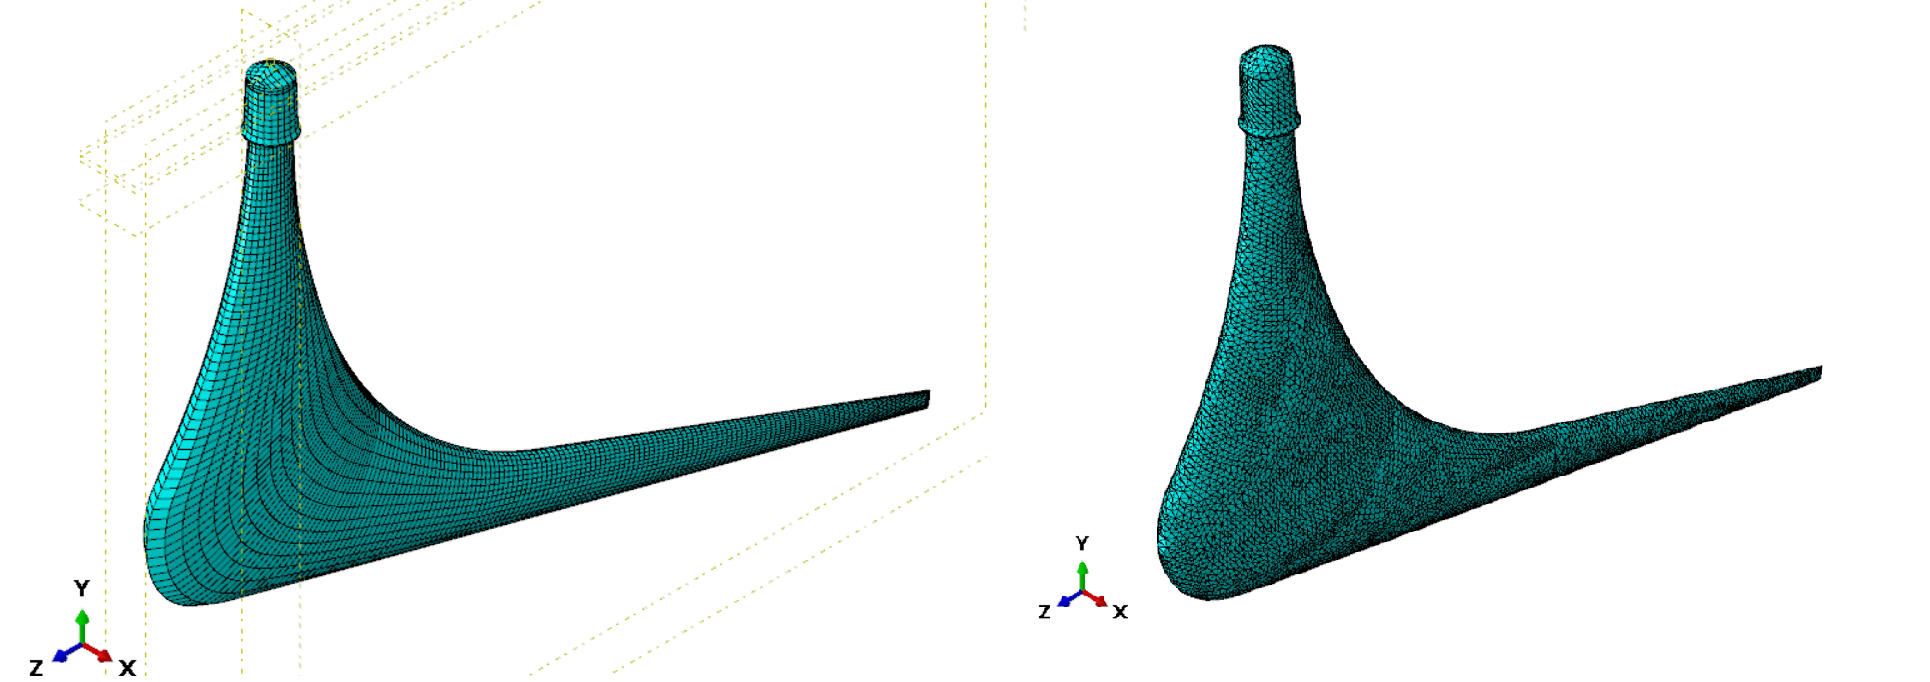
Figure 5. Comparison between Hexa- and Tetrahedral mesh on the same part with the same seed.
Example 2 - Femoral Cartilage
In this example, the cartilage geometry is not obtained from a CAD system, like SOLIDWORKS, rather by manually segmenting an MRI image. This lets us obtain an STL of the femoral cartilage surface. With a bit of help from MeshLab (smoothing and post-processing the geometry) and Matlab (STL to SAT conversion script online) we can obtain an SAT file (Figure 6).

Figure 6. a) STL output from segmentation software; b) Surface mesh on the STL assigned by default; c) Surface mesh after some post-processing in MeshLab using smoothing and edge combining.
First, let's get rid of the surface mesh left over from the segmentation procedure. In the mesh module we select Virtual Topology: Combine Faces and select everything. Now we only have the geometry. The edges of the geometry are not that important for the loading. Thus, we can cut a very small portion of them away to get a straight edge. Similar to the previous example we need a ~4 cutting planes, offset from the principal axes. Then we can use a few Create Cut: Extrudes along the outside edges (Figure 7). First, we do the Cut:Extrude on the XY plane, focusing on only the part that are roughly in that plane. Then we do two Cut:Extrude from the two XZ planes going outwards.
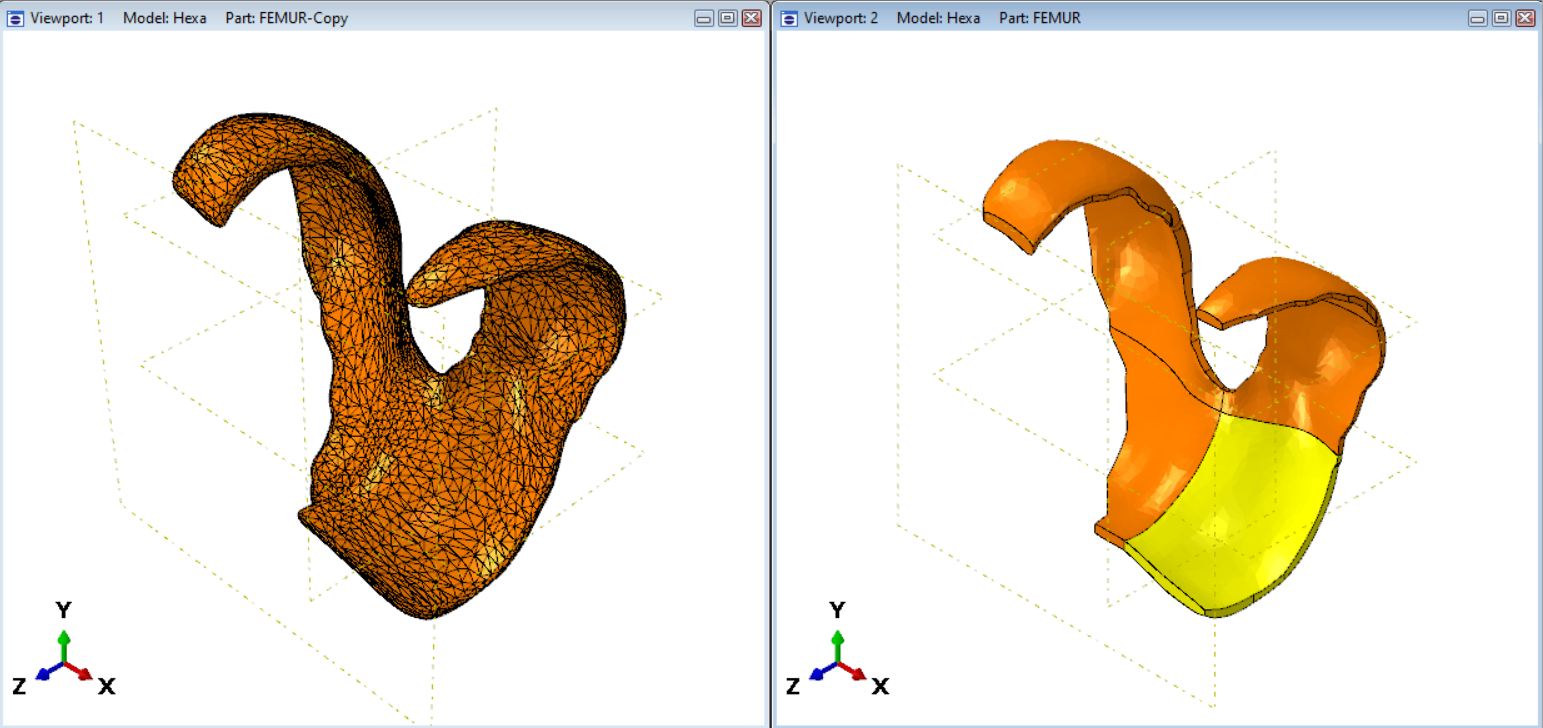
Figure 7. (Left) original mesh. Note: the same edges are also present in the part on the surface; (Right) Geometry after extruding away along the outside edges, cutting away a very small portion that will not influence the results.
Now, we're getting closer to meshing the entire part using hexahedral elements. Now we can simply define additional cutting planes as offset from principal axes. An additional 12 should help. After partitioning the part using Partition Cell: Use Datum plane, we get the final part (Figure 8). This can now be meshed with hexahdral elements. Interestingly, in some areas we can use a structured mesh (green) as opposed to the typical sweep techniques (yellow) (Figure 8). To achieve this we "only" need to make 33 partitions.
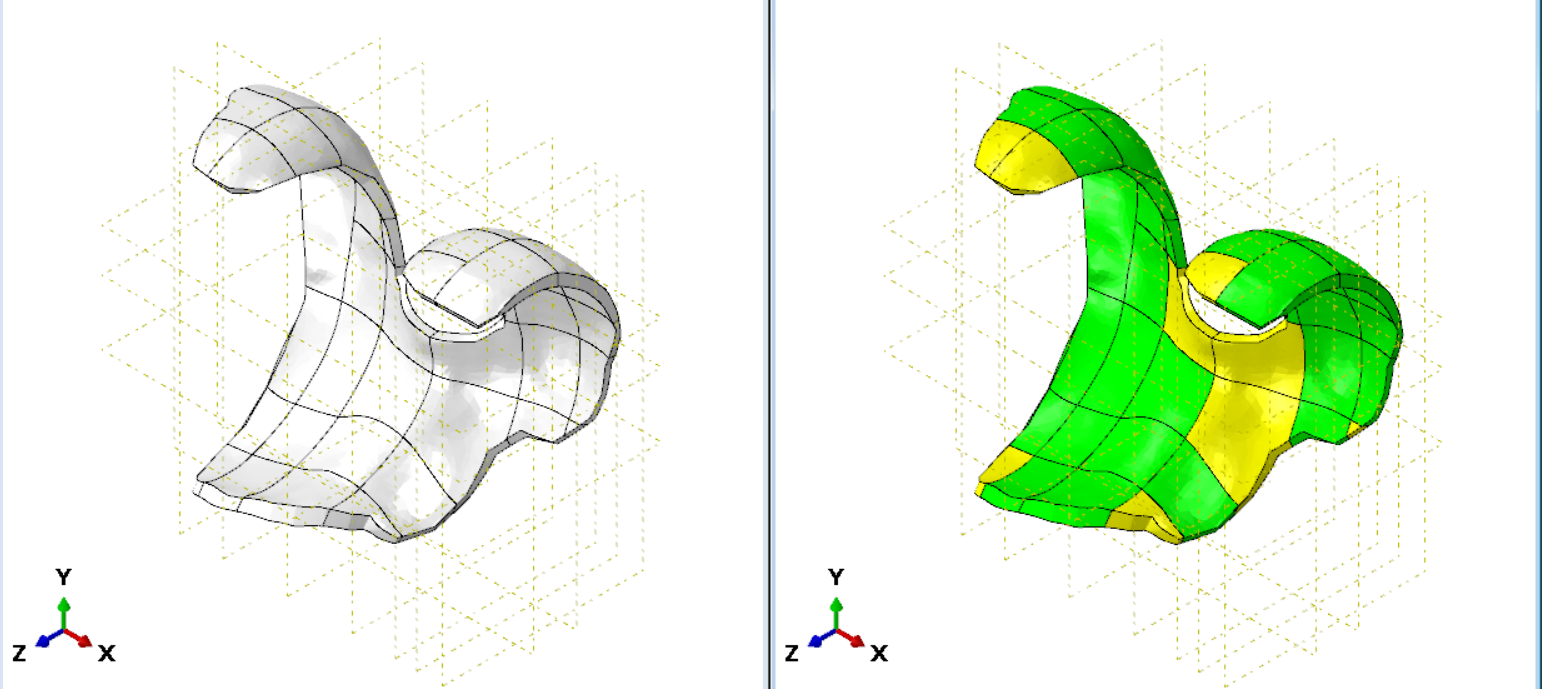
Figure 8. Geometry and mesh after partitioning.
Finally, we can see a comparison between the original mesh and the new hexahedral version (Figure 9). Aside from the mesh being more uniform and conforming better to the shape, we can again assign local seeds to increase the mesh density in areas of interest. 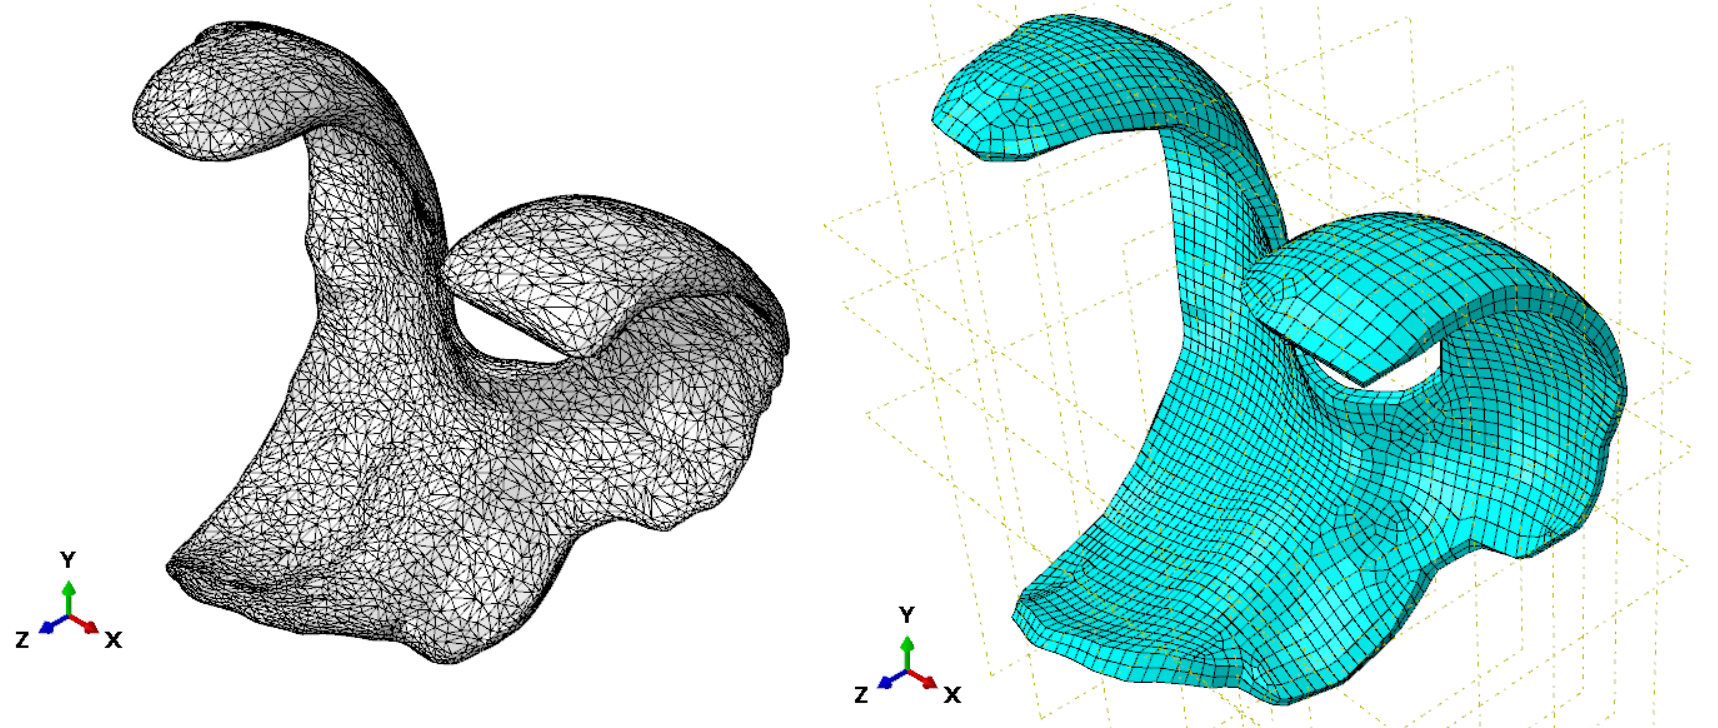
Figure 9. Comparison between original tetrahedral mesh and final hexahedral.
Of course it is not possible to always mesh with hexahedrals, no matter how clever we cut and partition. One such example is in Figure 10, where there is a small depth-wise crack in the geometry and this crack has a very irregular shape. Still, most of the geometry can be meshed with hexahedral elements, using additional partitions and cuts.
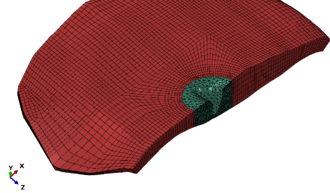
Figure 10. Tibial cartilage with a focal crack depth-wise crack.
Discussion
Meshing is always a tricky part in FE modelling. On one hand, one could simply use a tetrahedral mesh and just increase the density. This part is easy and just takes a few minutes to do. However, there is a problem: what about the run-time? If we take the Example 1, using the same characteristic element length (mesh density = 10), there are ~8 times more elements for tetrahedral meshes (Figure 5). Another problem that may arise is the ease of defining boundary conditions and loads. Take for instance the femoral cartilage in Figure 9. The inner part of the cartilage needs to be kinematically coupled to a reference point. All loads will be applied to this reference point. The out part of the cartilage will be in contact with other parts. On the other hand, one could spend quite some time on geometry and meshing, even a week. But it would overcome the issues above. Thus, it is worth it.
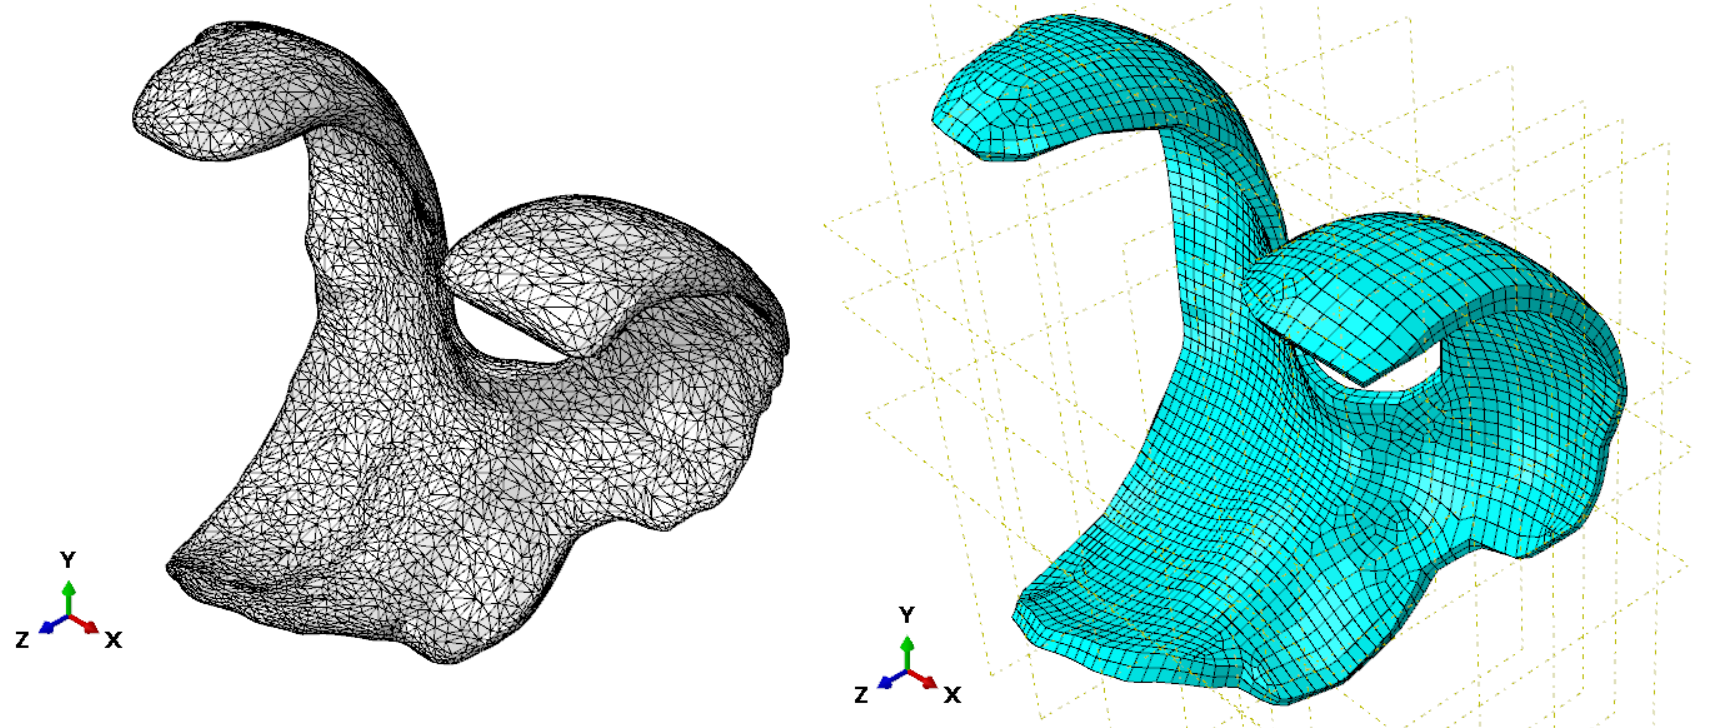



 Figure 3. YZ-plane view of the shell path. Black line - from this point up all lines (cutting planes) will be horizontal; Blue line - from this point down all lines (cutting planes) are parallel to this line. Line going through the center is at almost the midpoint between the exterior edges.


